Hi lovelies, I'm back again for another Manicure Monday look!
This time
I tried to do something a little different and put together a picture
tutorial for you all.
(If impatient click here for Picture Tutorial)
The
color palette for this look actually comes from some bowls we are
selling at work :P I thought it was such a fresh combo of lime and
plum that I couldn't resist trying it out on my tips. So see! Work is
not a complete drain of creative energy, sometimes it can be an
inspiration as well!
Luckily
enough I went home and dug through my polish box and came up with
these two beauties.
The
Nail Polishes:
I
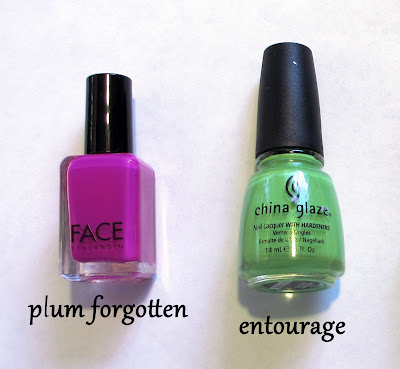
received the FACE polish as a gift, but never got a chance to try it
out. The color is a sensuous medium tone violet called, Plum
Forgotten. I had never heard of their polishes before and was
pleasantly surprised with how smooth and saturated this lacquer is.
Interestingly enough it also dries slightly matte, but you can't tell
here because I top coated over the final look.
The
lime green on the left is China Glaze in Entourage. This is a very
saturated yellow-green, bordering on chartreuse with fun micro
glitter. I've actually had this polish for quite a while, but it is
just so overpoweringly electric when worn by itself I never gave it
much thought. So when I stumbled upon it again I realized what great
potential it had as an accent color! And thus this look was born! :3


So
without further ado here is my little step by step.
Lemme know if you guys have any questions!
Lemme know if you guys have any questions!
Tutorial
Anyways,
the point is that I didn't have any, probably because I don't even
know what they are called =_= So I improvised!
You
can really use anything that will stick to your nail and has a curve
to it. I even had a friend once who cut masking tape to match the arc
she wanted...but that's super dedication I don't have v_v;
Then
go to town and Paint 'em up!
***more
taping off tips at my Pink Petite Four Tape Tutorial***
Ta
dah! Now you're done and ready to rock this playful retro, manicure!
Sorry ended up being more wordy that I had anticipated. So to make it up for your candy starved eyes some more pretty pictures:P
Sorry ended up being more wordy that I had anticipated. So to make it up for your candy starved eyes some more pretty pictures:P
Are
you guys sick of seeing my garden foliage yet?
I will try to come up with more interesting props next time!
I will try to come up with more interesting props next time!
Thank
you for reading! And please leave me any questions, comments,
criticism, love...it will all be much appreciated!!!
-wanyachu


I love this!! Super cute!
ReplyDelete:D Thank you!!! ~ Always want to think of new looks to try out and share!
DeleteVery cute manicure. Just looking great for spring/ summer time.
ReplyDeleteYay! That is exactly what I was going for! Some fun, poppy colors for spring! Thanks so much!
DeleteI always wondered how you got that nice arch...and now the beans have been spilled! >:)
ReplyDeleteHahhaha! Actually this is only the second time I've tried it this way. :P The first was with the Zoya Half Moon mani from last week. But since it seemed to work out pretty well I thought I would share!
DeleteHope it helps and loved to see what you come up with too!
omg!!! i really like this one!!! i'll have to try it out the next time I do my nails!! THANKS FOR THE IDEA!! =D
ReplyDelete